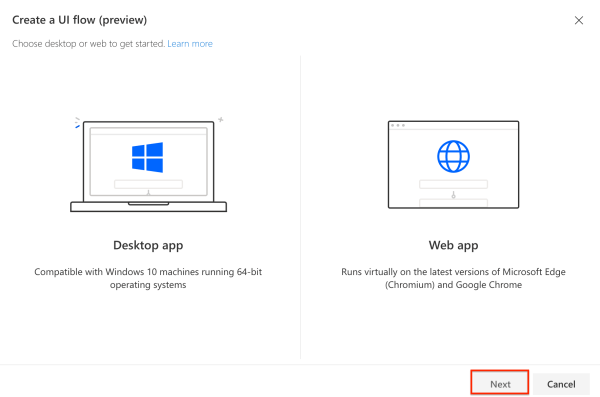
Hello Readers and Viewers In this episode we will learn about the business use cases of robotic process automation or UI Flows. If you want to learn about setting up UI flows, please read this post https://diyd365.com/2019/12/11/everything-you-need-to-run-a-ui-flow-power-automate We will look at both desktop and web app. I have taken two business scenarios: Automation Testing of... Continue Reading →
#TGIF Episode 6: UI Flows (RPA) in Power Automate (Both desktop & web app)


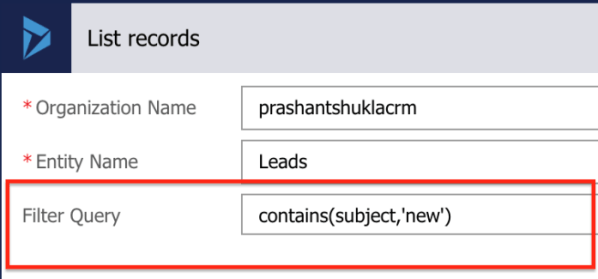
")