
")
Hello Readers and Viewers
This blog/video is part of my quick tip series. We are going to look at how we can force a screen to be visible to a user irrespective of the transition, in other words delay screen transition.
Skip to the video, if you don’t want to read
Example Problem 1: if we want to Navigate to more than one screen back to back only the last screen mentioned in navigate formula is visible to the user; that means one navigate screen is skipped. for e.g. look at the formula below:
Select(Parent);SubmitForm(checkinform_1);ResetForm(checkinform_1);Navigate(Success,ScreenTransition.Fade);Navigate(lstMembers)
If you apply the above formula to your Power Apps, users will always end up seeing “Navigate(lstMembers)” and the success screen is skipped.
Example Problem 2: if we remove the last bit of the formula and have only one ‘navigate’ as shown below:
Select(Parent);SubmitForm(checkinform_1);ResetForm(checkinform_1);Navigate(Success,ScreenTransition.Fade)
if you apply the above formula, users will have to touch on the success screen somewhere to be able to see any other screen. (assuming success button in below screen will have navigate formula)

Solution to both the example problems: First of all remove the last navigate from the formula and only have one navigate, shown below:
Select(Parent);SubmitForm(checkinform_1);ResetForm(checkinform_1);Navigate(Success,ScreenTransition.Fade)
Note: I am not saying you must use the exact same formula as above, you need to change the formula as per your need but only have one navigate in the formula.
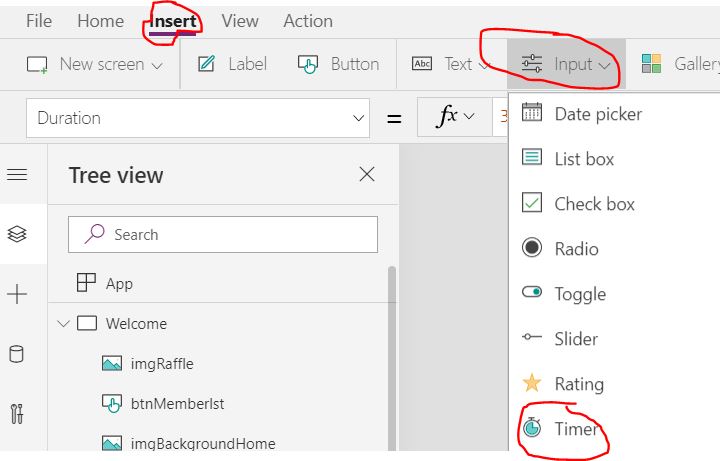
Now on your success screen add a timer by going to Insert>>Input>>Timer
Set AutoStart to true
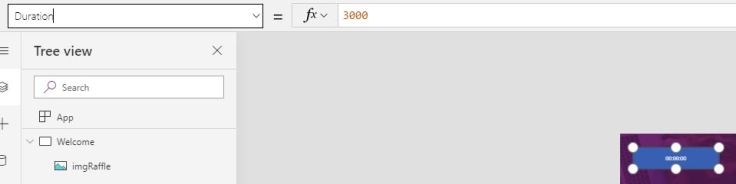
Set the duration of the timer by clicking on the timer on screen (Completely on your requirements, for how long you want a user to see a screen)
1000=1 second 5000=5 seconds 30000=30 seconds
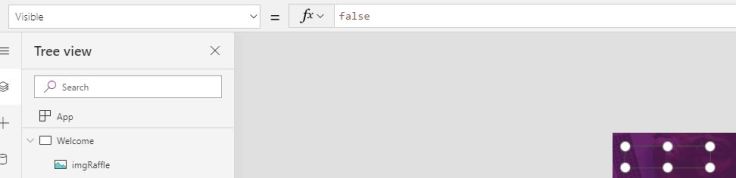
Set OnSelect to false


Set the second navigation on your ‘TimerEnd’ property

Now hide the timer, so your users can’t see it
And all done, your users will now be navigated to the screen of choice without having to click anywhere.
Business Use Case: You want your users to see a success screen for ‘n’ seconds and then auto-redirect to a list or another form.
Video here:
Let me know your thoughts!
Subscribe to my channel and follow my blog.
Thanks!
Let’s keep sharing!

