Tag: New Features

Managing D365 Security Roles via PowerApps

Hi Readers and Viewers

In this video, we will look at D365 Users and security roles in Canvas App.

Following are some key features of the app:

  • See list of users
  • See list of security roles
  • Assign security role to a user
  • Check security role of a user
  • Go to D365 Advanced Settings from within PowerApps
  • Go to MS Flows from within PowerApps

Here’s the video:

Please subscribe to my YouTube Channel and follow my blog.

Hope it helps!


PowerApps for Business Users & Consultants: Episode 6- Embedding Canvas App in Model Driven App

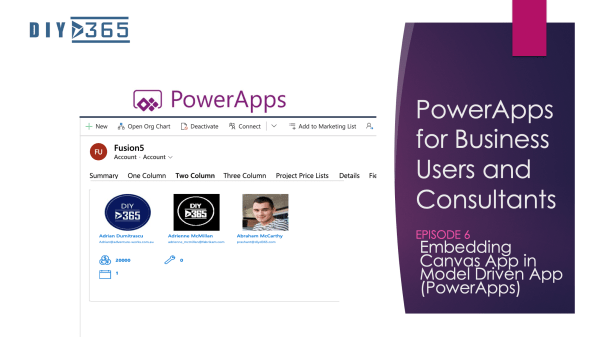
Hi Readers and Viewers

In this episode, we are going to look at, How to embed a canvas app into a model driven app.

We talk about the following limitations:

  1. One canvas app per model driven form.
  2. Changes in each app must be published separately to reflect.

We talk about some tips:

  1. Change format of the section of the field where you have enabled canvas app control.
  2. Make the field appear in the middle of section so that your canvas app can get most space.
  3. Rename the display name of the field to something small so that it takes less space.
  4. If you’re adding control to a very important field like ‘Account Name’ maybe add it twice on the form on different location.

We look at different layouts where the app looks better:

  • One column tab
  • Two columns tab
  • Three columns tab

Video here:

Subscribe to my YT channel and follow my blog.

Hope it helps!

PowerApps for Business Users & Consultants: Episode 4- Building Your First PowerApp

Hi Readers and Viewers

In this episode we are going to build our first app from scratch. This episode is based on a real life scenario to help the residents of a society. The residents will be able to do the following:

  • Service Requests
    • List of ‘My Request’
    • Raise a new request
  • Club Events
    • List of ‘Events’
    • Submit a response
  • Upcoming Payments
    • List of upcoming payments

Your learnings from this session would be:

  1. Adding a Welcome Screen
    • With background and logo icon
    • Making an image clickable
  2. Adding a home screen
    • Adding buttons
    • Renaming buttons
    • Changing OnSelect property of buttons
  3. Adding galleries/list screen
    • Adding Service Request list
      • Filter service requests by logged in user’s email/full name
      • Click a button to open a new service request
      • Click a button to submit a request
      • Click a button to see details of a request
    • Adding Invoice list
      • Click a button to see details
      • Filter on logged in user’s email and due date in future
    • Adding campaign list
      • Click a button to see campaign details
      • One screen for campaign detail and new response form
  4. Reset a form after submission

Video Here:

Subscribe to my channel and follow my blog for more such topics.

Hope it helps!

Happy CRMing!

Every PowerApps Formula You Ever Wanted To Know As A Functional Consultant

Hello Readers

This blog is to help fellow consultants to start their journey on PowerApps. We all know how easy it is to put together a screen on Canvas Apps but as and when we need a specific action on it or from it; we fall short of formulas/functions. That’s because we never required these formulas in Model Driven Apps.

But as Business/Functional Consultant, you want to deliver value to your client, make their life easier, Don’t you?

I am sure you do, so here I am providing you with 20 essential functions you must know as a functional consultant. This can be a starting point for you; well, Microsoft is trying hard for Business Users and Functional Consultants to get in the rink of Power Platform. Their learning path is specially designed for Business Users and Functional Consultants, check it out here Learn PowerApps.

All formulas below are simple and easy to understand. You’ll need it in everyday consulting; maybe for pre-sales, maybe for proof of concepts or maybe for a real world app.

1.Default a lookup in next screen based on the record created in previous screen

e.g create a contact first (in screen 1) then set primary contact when creating account (in screen 2)

Set Lookup fields datacardvalue’s ‘defaultselecteditem’ = Edit/New/FormN.LastSubmit

**N=Your form sequence

Picture 1

2.Set a lookup with required display field

Set Lookup fields datacardvalue’s ‘DisplayFields’ = [“Fieldname”]

Picture 1.png

3.Set a lookup with required search field

Set Lookup fields datacardvalue’s ‘SearchFields’ = [“Fieldname”]

Picture 1

4.Set a lookup with multiple search fields

Set Lookup fields datacardvalue’s ‘SearchFields’ = [“Fieldname1”, “Fieldname2”]

Picture 1

5.Nested grid

Filter(ChildEntityName,’LookupFieldName’. ‘PrimaryFieldName’ =ParentEntityGallery.Selected.’PrimaryFieldName’)

See account and contact example below; it shows related contacts of a selected account

Picture 1

6.Set Date/Date & Time to the current date/time

Set Data card ‘default’ = Now()

Picture 1

7.Set Date/Date & Time to current plus:

+30 minutes

Set Data card ‘default’ = Now()+0.5/24

Picture 1

+1 hour

Set Data card ‘default’ = Now()+1/24

+1 Day

Set Data card ‘default’ = Now()+1

+30 Days

Set Data card ‘default’ = Now()+30

Picture 1

8.Change No. of years that can be selected in date picker

Set the Start year and End year in the Date picker (Start and End date)

Set Date Value ‘Start Year’ or ‘End Year’ = Required Year

Picture 1Picture 1

9.Add Years to an End Date, date picker

Set date value Start or End Year = Year(Today())+N

**N=No. of Years

Picture 1 

10.Save a form (on button click) to create a record

Set button OnSelect = SubmitForm.FormN

**N= Sequence of form in your app

Picture 1

11.Save a form to create a record and navigate to a different screen

Set button OnSelect = SubmitForm.FormN;Navigate(ScreenN)

**N=Sequence of form/screen in your app

Picture 1

12.Save a form to create a record and show success message

Set button OnSelect = SubmitForm.FormN;Navigate(ScreenN)

**ScreenN=Your Success Screen

Picture 1

13.Set Camera to store photos in your PowerApps collection

Set Camera Onselect= Collect(colPhoto,CameraN.Photo)

**CameraN=Your Camera Sequence

Picture 1 

14.Set entity image to last photo taken by camera

Set EntityImageDataCard’s Image’s Image = If(IsBlank(CameraN.Photo), Parent.Default, CameraN.Photo)

**CameraN=Your Camera Sequence

Meaning of this function- if cameraN does not have any picture in it (as in you haven’t clicked anything yet) then entity image would take its default value. But if you have clicked a picture; entity image will pick that image.

Picture 1

15.Select a record from a grid

Set Icon’s ‘OnSelect’ = Select(Parent)

Picture 1 


16.Open a record from a grid

Set Icon’s ‘OnSelect’ = Select(Parent);Navigate(ScreenN)

ScreenN=View/edit screen

Picture 1 

17.Delete a record on a grid

Set Icon’s ‘OnSelect’ =RemoveIf(datasource, primaryfield = GalleryN.Selected.primaryfield)

Picture 1

18.Setting up a logo on screen

Insert Tab>> Add Image>>Upload>> Resize from properties

Picture 1

19.Setting up a background image

Insert Tab>> Add Image>>Upload>> Resize>>Send to back

Picture 1


20.Rounding an Image

Click on image and set height and width equal

Picture 1

Now set, RadiusTopLeft =RadiusTopRight=RadiusBottomLeft=RadiusBottomRight=ImageN.Height

**Under Advanced on the right of your screen

Picture 1

Those are enough formulas to get you started. 🙂

Hope you find this helpful!

Subscribe to my YouTube

Happy CRMing !!